


How to Grow Moss on Terracotta Pots and Keep It Green Outdoors


I have been growing moss on terracotta pots for quite a long time. Some of my pots are now almost completely covered in green moss, and they stay green throughout the year.
Here are more photos and videos.
I want to bring all those experiences together and explain how I grow them, which mosses work best, what plants I grow with them, and how I maintain them outdoors.
The process is actually very simple. You do not need to cover the entire pot with moss at the beginning. A small piece of the right moss can gradually spread and cover the whole surface.
But choosing the right moss and providing the right environment are very important.
1. My Growing Environment
First, let me explain the climate where I live.
I live in a warm and humid region of southern China. The climate is generally suitable for many types of moss and tropical plants, but the conditions change quite a lot throughout the year.
There are months with frequent rain. During those periods, I often do not need to water my moss-covered pots at all. The rain does the work for me.
There are also months with many sunny days in a row and very little rain. During those dry periods, I usually need to water the pots every day.
Summer is actually one of the more difficult seasons for growing moss outdoors.
Although summer brings plenty of rain, it also brings very strong sunlight and high temperatures. Water evaporates extremely quickly, and the moss can dry out much faster than you might expect.
Sometimes the moss looks perfectly green in the morning, but after a hot, sunny day, it can already look dry by the afternoon.
So even in a warm, humid climate, summer is not necessarily the best season for moss.
This is why shade is the most important part of my growing environment.
My moss-covered pots are kept on a shaded outdoor balcony, surrounded by plants such as begonias and ferns.
They receive natural light and good airflow, but they are protected from strong direct sunlight.
If you live somewhere with similar conditions, this method may work well for you too. If your climate is different, you may need to adjust the watering frequency and the amount of shade.
2. Which Moss Works Best?
For this kind of project, my first choice is sheet moss (Hypnum moss).
I have used both larger and smaller varieties, as well as other fine, carpet-forming mosses.
The important thing is not simply the name of the moss. It is the way it grows.
I look for moss that forms a dense, flat mat and can gradually spread outward.
These mosses can start from a small patch and slowly cover the surface of a terracotta pot, creating a continuous green carpet.
Large Sheet Moss
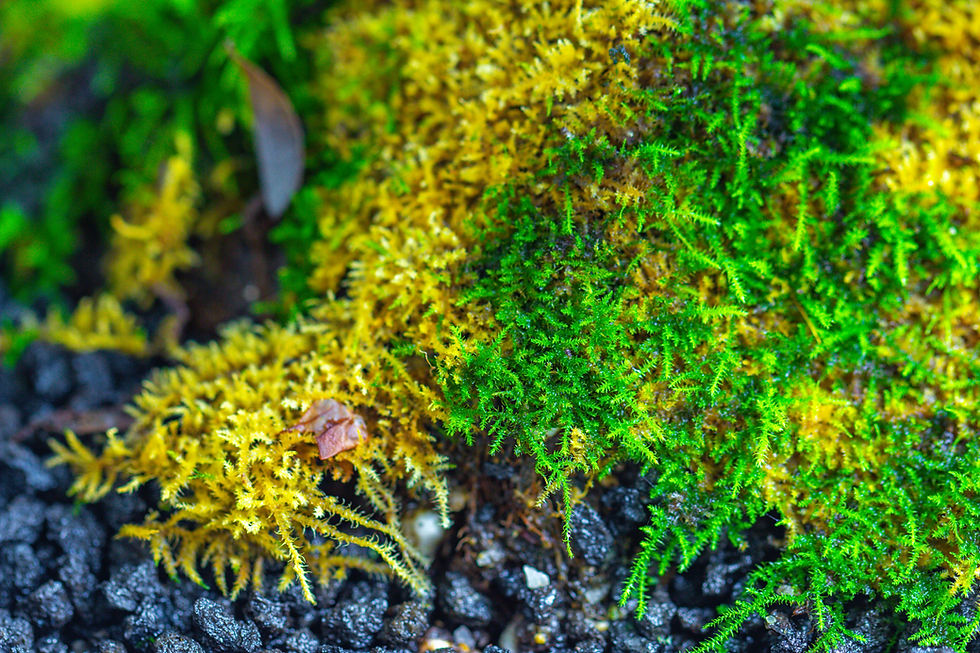
I especially like larger varieties of sheet moss for outdoor pots (the above photos).
They are stronger and grow larger than the small varieties.
I do not usually use them inside very small, closed terrariums. They can grow too tall and eventually cover the smaller plants.
But for larger flowerpots and open terrariums, I highly recommend them.
With good airflow, the moss can grow close to the surface and form a thick green layer.
It also looks more balanced with larger potted plants.
Small Sheet Moss and Other Carpet-Forming Mosses
Smaller types of sheet moss also work very well.
In fact, if you want a very fine, even carpet covering the pot, smaller mosses may give you the appearance you are looking for.
I have also found small feather mosses and other short, dense, mat-forming mosses growing in similar environments.
You do not need to identify every species perfectly before trying this project.
Look for moss that grows in thin, continuous mats and spreads naturally across damp surfaces.
(please check below photos and those shows on the very first photos in this blog is are mini sheet moss).
What About Fissidens Moss?
I often recommend Fissidens moss for terrariums and the surface of flowerpots.
It can handle wet conditions and direct watering quite well.
However, Fissidens moss grows much more slowly and does not spread outward as quickly as sheet moss.
I have placed some Fissidens moss in the middle of one of my moss-covered pots. It grows well there, but it does not create the same spreading green-carpet effect.
So I prefer using it as an accent rather than the main moss for covering an entire pot.
What About Bryum Moss, Racomitrium Moss, and Leucobryum Moss?
I have tried other mosses too.
Bryum moss and Racomitrium moss can grow outdoors, but in my conditions, they do not perform as well as sheet moss for this particular project.
(check the below photos, they need strong indirect sunlight, dryer environment and they do not form carpet)
During hot, dry weather, they can lose moisture very quickly.
I have seen moss growing beside walls that looked green in the morning but had become dark and dry by midday.
Leucobryum moss is another beautiful moss, but I do not recommend it for this type of outdoor pot.
In my experience, it needs more stable humidity and does not respond well to the kind of direct watering I use for my flowerpots.
I tried growing it this way myself, and the results were terrible.
The following photos are sheet moss.

For a moss-covered terracotta pot that needs regular watering, sheet moss is still my first choice.
What About Plagiomnium Moss?
Plagiomnium moss is another good choice for covering the surface of a flowerpot.
Like sheet moss, it can spread outward and gradually form a thick green carpet.
However, Plagiomnium moss prefers much wetter conditions. It can even tolerate being submerged in water for short periods.
If you are growing a plant that prefers consistently wet soil, or if your flowerpot has no drainage holes, Plagiomnium moss may be a better choice than sheet moss, as long as the main plant can also tolerate those wet conditions.
3. Which Plants Can You Grow in the Pot?
I prefer to grow plants that enjoy similar conditions to the moss.
My favorites include:
Begonias
Caladiums
Ferns
Other tropical foliage plants that prefer shade and moist soil
These plants are a good match for my shaded outdoor growing area.
The moisture and shade that help the plants grow also help the moss growing on the outside of the pot.
One of my earliest moss-covered pots contains a dawn redwood. I have also grown moss on pots containing larger foliage plants.
For larger plants and bigger pots, I especially like using large sheet moss. Its size looks more natural next to the larger leaves and containers.
Of course, different plants have different root and watering requirements. Choose plants that can tolerate the moisture conditions you plan to provide, rather than keeping every type of plant constantly wet.
4. How to Make a Moss-Covered Terracotta Pot
Now let me explain how to recreate the effect in my photos.
Step 1: Choose a Terracotta Pot
Buy an ordinary, inexpensive terracotta pot.
The important thing is that it should be unglazed and slightly rough.
You do not want a smooth, shiny, glazed surface.
Terracotta is a good material for this project because its porous surface can hold moisture. Moss can also attach to bricks and similar rough surfaces.
In my experience, moss grows especially well when the terracotta has a very thin layer of soil on it.
Step 2: Plant Something in the Pot
Choose a plant that likes shade and moisture.
Begonias, Caladiums, and many ferns are good choices for my growing conditions.
Place the pot somewhere shaded, with natural light and airflow.
Step 3: Apply Some Muddy Water
This is an important step.
Mix a little soil with water to make muddy water.
Brush or pour some of it over the outside surface of the terracotta pot.
You only need a thin layer.
This helps create a surface where moss can establish itself more easily.
Step 4: Add a Small Piece of Moss
You do not need to buy enough moss to cover the whole pot.
Just take a small patch of sheet moss and place it against the damp surface.
Large sheet moss or small sheet moss can both work.
If the conditions are suitable, the moss will begin to grow outward over time.
This is the part I enjoy most.
Instead of covering the entire pot myself, I let the moss slowly do the work.
Step 5: Keep It Moist and Give It Time
Keep the pot in a shaded location.
Water it regularly, adjusting the frequency according to the weather.
In my growing environment, I water daily during long dry periods. During rainy months, I often do not need to water it myself.
The moss gradually spreads across the terracotta.
You will not get a completely green pot overnight.
But with suitable conditions and enough time, you can see a real difference in less than a year.
Eventually, the pot may become covered with a thick layer of green moss.
5. How I Maintain My Moss-Covered Pots
My maintenance routine is simple.
Shade comes first.
Strong direct sunlight can damage the moss very quickly, especially during hot weather.
I keep my pots in a shaded outdoor area rather than exposing them to direct midday sun.
Water according to the weather.
During dry periods, I usually water every day.
During rainy periods, I may not need to water at all.
The goal is to keep the moss from drying out for long periods, while also making sure the plant inside the pot has suitable drainage and root conditions.
Good airflow is helpful.
In my experience, larger sheet moss grows more compactly in a well-ventilated outdoor environment.
Inside a small closed terrarium, the same moss may grow much taller and eventually cover other plants.
Do not worry if the coverage is uneven at first.
A small patch of moss can gradually spread across the surface.
As long as it is growing well, I prefer to let it develop naturally.
6. Do You Need to Buy the Moss?
That depends on where you live.
In some warm, humid areas, sheet moss grows naturally on damp soil, old walls, bricks, and abandoned buildings.
In my own growing area, I have even seen wild sheet moss spread onto my flowerpots by itself.
But I have also visited many parks and found that larger sheet moss can be harder to find than the smaller varieties.
If you cannot find suitable moss locally, buying a small amount is often easier.
You do not need very much to start.
If you collect moss outdoors, make sure you have permission and follow any local conservation rules.
7. What I Have Learned from Growing These Pots Over Time
The most important lesson is that growing a moss-covered pot is not really about attaching a large amount of moss to a container.
It is about creating an environment where the moss can grow and spread naturally.
The right moss makes a big difference.
A rough terracotta surface helps.
Shade is essential in hot, sunny conditions.
Watering needs to follow the weather rather than a fixed schedule.
And finally, you need patience.
Some of my pots have stayed green through different seasons, including rainy periods and long stretches of dry weather.
I have also made mistakes and tried mosses that did not work well.
But that is part of the process.
I will continue sharing photos and videos of these pots as they grow and change, so you can see how the moss develops over time.
If you have a shaded outdoor space and a simple unglazed terracotta pot, this is a project worth trying.
Start with a small piece of sheet moss, give it the right environment, and let it grow.
To be updated...


Comments